Tạo sitemap hay mục lục (Table Of Contents) cho Blogpost


Một dạng sitemap hay bảng mục lục (Table Of Content(TOC)) được Abu-Farhan phát triển rất, mình thấy rất phù hợp cho các blogger nên hôm nay mình xin chia sẽ cùng các bạn cách tạo Table Of Content này. Bạn có thể xem ảnh minh họa bên dưới


Hình ảnh minh họa
» Bắt đầu thủ thuật

1. Đăng nhập vào tài khoản Blogger
2. Vào phần thiết kế (Design)
3. Chọn chỉnh sửa HTML (Edit HTML)
4. Chèn code CSS bên dưới vào trước thẻ ]]></b:skin>
.gfg-root {
width : 528px; /* độ rộng của TOC*/
height : auto;
magin-left:5px;
overflow : hidden;
text-align : center;
font-family: arial;
border: 1px dotted #fff; /* đường viền TOC*/
font-size: 12px; /* cở chữ của TOC*/
}
.gfg-subtitle {
font-size: 12px; /* cở chữ của phần tên nhãn*/
font-weight : bold;
background: url(https://blogger.googleusercontent.com/img/b/R29vZ2xl/AVvXsEhGXkopKU2uliqNi8JyPfkbWuFCi9bop550muPFJqrhsIg8CsB2yOMDjUKsZ2qXwek5c551YPYhjC8pQ-qxlMi5IGHictqsczLBryNxO1RUr3-cV7MlCo1opVThSADnyRhq1bOaoKndR1ZN/);
overflow : hidden;
margin-bottom : 0px;
text-align:left;
}
.gfg-subtitle a {
color : #ff0000; /* màu chữ của tên nhãn*/
padding:3px 0px 3px 15px;}
.gfg-subtitle a:hover {
color : #fff; /* màu chữ của tên nhãn khi rê chuột*/
}
.gfg-list {
position : relative;
overflow : hidden;
text-align : left;
margin-bottom : 5px;
}
.gfg-list a{
color:#666; /* màu chữ của tiêu đề bài viết*/
}
.gfg-list a:hover{
color:#000; /* màu chữ của tiêu đề bài viết khi rê chuột*/
}

5. Save template lại
6. Bạn vào soạn thảo bài viết mới (New Post) ở chế độ HTML và chèn vào code bên dưới
<script style="text/javascript" src="http://k3nvil.googlecode.com/files/sitemap.js"></script> <script src="http://k3nvil.blogspot.com/feeds/posts/default?max-results=9999&alt=json-in-script&callback=loadtoc"></script>

- Bạn thay http://k3nvil.blogspot.com thành địa chỉ blog của bạn.

7. Bây giờ bạn xuất bản bài viết (Publish posts) là xong

Ở trên mình hướng dẫn bạn chèn vào trong phần soạn thảo bài viết, tuy nhiên bạn vẫn có thể chèn vào ngay HTML/Javascript và cho nó hiển thị ở một vị trí thích hợp.

Chúc bạn thành công

Tham khảo abu-farhan.com
[Xem tiếp...]


Tiện ích bài viết liên quan cũ mới cùng chủ đề Địa chỉ bài viết: http://www.traidatmui.com/2011/01/tien-ich-bai-viet-lien-quan-cu-moi-cung.html#ixzz1v7GgsFeL Nguồn: TRAIDATMUI.com


(Traidatmui.com) - Tiếp theo thủ thuật tạo bài viết liên quan cho bài viết trên blogspot, mình xin giới thiệu đến các bạn cách tạo "Bài viết liên quan cũ và mới có cùng chủ đề" cho blogspot. Với tiện ích này thì khi người dùng xem một bài viết nào đó, nó sẽ hiển thị các viết cũ hơn hay bài viết mới hơn trong cùng một nhãn với bài viết đó. Ở đây chúng ta sẽ cho tiện ích này nằm ở cuối mỗi bài đăng trên blog, tiện ích này sẽ giúp người dùng có thể dễ dàng tìm kiếm các bài viết trong chủ đề mà họ đang quan tâm. Bạn có thể xem hình ảnh bên dưới để thấy các hiển thị của tiện ích này.
Hình ảnh minh họa
1. Đầu tiên đăng nhập Blogger
2. Vào thiết kế, chọn chỉnh sửa HTML
3. Chọn Mở rộng mẫu tiện ích (Expand Widget Templates)
4. Chèn code css vào trước thẻ ]]></b:skin>
#related-posts-block {
margin:10px 5px;
font-size:10px;
color:#333; /*màu text của tiện ích*/
font-family:tahoma; /*font chữ của tiện ích*/
}
#related-posts-loading-text{
font-size:12px;
text-align:center;
color:#000099;}

#related-newest-href {
margin:10px 5px 0px 15px;
}
#related-newest-title {
font-size:12px; /*cỡ text của phần "Các bài viết mới cùng chủ đề"*/
margin:10px 5px;
color:#000099; /*màu chữ của phần "Các bài viết mới cùng chủ đề"*/
}
#related-posts-block #related-newest-href a{
font-size:12px; /*cỡ text của tiêu đề bài viết trong phần "Các bài viết mới cùng chủ đề"*/
font-family:Arial, Helvetica, sans-serif;
color:#000066; /*màu chữ của tiêu đề bài viết trong phần "Các bài viết mới cùng chủ đề"*/
}
#related-posts-block #related-newest-href a:hover{
font-family:Arial, Helvetica, sans-serif;
color:#ff00ff;
}
#related-older-href {
margin:10px 5px 0px 15px;
list-style-type:none;
}
#related-older-title {
font-size:12px; /*cỡ text của phần "Các bài viết cũ cùng chủ đề"*/
margin:10px 5px;
color:#000099; /*màu chữ của phần "Các bài viết cũ cùng chủ đề"*/
font-family:Arial, Helvetica, sans-serif;
}
#related-posts-block #related-older-href a{
font-size:12px; /*cỡ text của tiêu đề bài viết trong phần "Các bài viết cũ cùng chủ đề"*/
font-family:Arial, Helvetica, sans-serif;
color:#000066; /*màu chữ của tiêu đề bài viết trong phần "Các bài viết cũ cùng chủ đề"*/
}
#related-posts-block #related-older-href a:hover{
color:#ff00ff;
}

Bạn dựa vào các dòng hướng dẫn trong code để tùy chỉnh lại cho phù hợp với blog của mình.

5. Tiếp theo, bạn tìm đến dòng code bên dưới hoặc tương tự
<div class='post-footer-line post-footer-line-3'/>

6. Chèn code bên dưới vào ngay sau code vừa tìm được
<script type='text/javascript'>
//<![CDATA[
var showdate = true; //Nếu không muốn hiển thị ngày tháng đăng bài, bạn thay True thành False
var max_post = 8; //Số bài viết hiển thị trong mỗi phần (Bài cũ và bài mới) của tiện ích
//]]>
</script>

<b:if cond='data:blog.pageType == &quot;item&quot;'><div id='post-labels-for-related' style='display:none'><b:if cond='data:post.labels'><b:loop values='data:post.labels' var='label'><data:label.name/><b:if cond='data:label.isLast != &quot;true&quot;'>,</b:if></b:loop></b:if></div><div id='post-timestamp-for-related' style='display:none'><data:post.timestampISO8601/></div>

<div id='post-timestamp-for-related' style='display:none'><data:post.timestampISO8601/></div>
<div id='related-posts-block'><div id='related-posts-loading-text'>Loading...<br/><img align='absmiddle' src='https://blogger.googleusercontent.com/img/b/R29vZ2xl/AVvXsEgbvkf2TDFoQKlAHPCxSv_M0y4pZh1P8iDZIeZvd34eagF8_4Q9AmILgPs2F0y4Ezh8wv29Oohs6BZjatd4y4LdYsvhze_RPzn9mLPSP-7yuV_OyRTy8e6klslKNt0FCS04dC-sCBH6ZtKx/'/></div><div id='related-newest-href'><div id='related-newest-title'/></div><div id='related-older-href'><div id='related-older-title'/></div></div></b:if>

<script src='http://data-traidatmui.appspot.com/scripts/related_npost.js' type='text/javascript'/>

7. Cuối cùng save template lại.

Lưu ý: tên các "Nhãn" bài viết nên được đặt bằng tiếng Anh hoặc tiếng Việt không dấu để tránh bị lỗi.

Chúc bạn thành công
[Xem tiếp...]


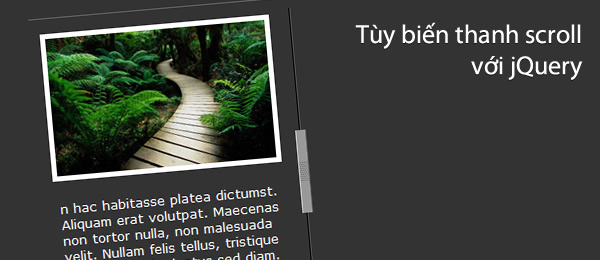
Tùy biến thanh cuộn (scrollbar) với JQuery


Traidatmui.com – Thông thường để trình bày một nội dung có độ dài khá dài trên web/blog thì chúng ta hay sử dụng hiệu ứng cuộn cho nội dung đó để không phải dàn trang ra quá dài. Vâng khi bạn cho nội dung cuộn với một độ rộng và chiều cao nhất định nó sẽ xuất hiện 2 thanh cuộn đó là thanh cuộn ngang (Horizontal scrollbar)và thanh cuộn dọc (Vertical scrollbar) để người dùng kéo lên xuống hay qua lại để xem nội dung. Và bây giờ bạn thấy thanh cuộn đó quá đơn giản, thấy nhàm chán và muốn thay đổi nó thì bài viết này mình chia sẻ cùng các bạn cách thay đổi nó. Ở đây mình chia sẻ 3 style cho bạn, bạn có thể xem demo để thấy rỏ hơn.


Hình ảnh minh họa

» Bắt đầu thủ thuật

1. Đăng nhập vào tài khoản Blogger
2. Vào phần thiết kế (Design)
3. Chọn chỉnh sửa HTML (Edit HTML)
4. Chèn code bên dưới vào sau thẻ <head>
<style type='text/css'>
/* content block 1 */
#mcs_container{ clear:both; margin:0 0 0 0px; width:260px; height:600px; padding:0 10px; border-top:1px solid #333; border-bottom:1px solid #333;}
#mcs_container .customScrollBox{position:relative; height:100%; overflow:hidden;}
#mcs_container .customScrollBox .container{position:relative; width:240px; top:0; float:left;}
#mcs_container .customScrollBox .content{clear:both;}
#mcs_container .customScrollBox .content p{padding:0 5px; margin:10px 0; color:#fff; font-family:Verdana, Geneva, sans-serif; font-size:13px; line-height:20px;}
#mcs_container .customScrollBox .content p.alt{padding:10px 5px; margin:10px 0; color:#fff; font-family:Georgia, &quot;Times New Roman&quot;, Times, serif; font-size:17px; line-height:19px; color:#999;}
#mcs_container .customScrollBox img{border:5px solid #fff;}
#mcs_container .dragger_container{position:relative; width:2px; height:525px; float:left; margin:40px 0 0 10px; background:#000; cursor:pointer -moz-border-radius:2px; -khtml-border-radius:2px; -webkit-border-radius:2px; border-radius:2px; cursor:s-resize;}
#mcs_container .dragger{position:absolute; width:2px; height:60px; background:#999; text-align:center; line-height:60px; color:#666; overflow:hidden; cursor:pointer; -moz-border-radius:2px; -khtml-border-radius:2px; -webkit-border-radius:2px; border-radius:2px;}
#mcs_container .dragger_pressed{position:absolute; width:4px; margin-left:-1px; height:60px; background:#999; text-align:center; line-height:60px; color:#666; overflow:hidden; -moz-border-radius:4px; -khtml-border-radius:4px; -webkit-border-radius:4px; border-radius:4px; cursor:s-resize;}
#mcs_container .scrollUpBtn,#mcs_container .scrollDownBtn{position:absolute; display:inline-block; width:14px; height:15px; margin-right:12px; text-decoration:none; right:0; filter:alpha(opacity=20); -moz-opacity:0.20; -khtml-opacity:0.20; opacity:0.20;}
#mcs_container .scrollUpBtn{top:16px; background:url(https://lh6.googleusercontent.com/-xsczTAr5f_8/TlcYH2p_dmI/AAAAAAAAAuQ/xjg4czun4MU/mcs_btnUp.png) center center no-repeat;}
#mcs_container .scrollDownBtn{bottom:12px; background:url(https://lh4.googleusercontent.com/-pDCA0YLCT7o/TlcYH7M1GoI/AAAAAAAAAuQ/OKS-q2zst0Q/mcs_btnDown.png) center center no-repeat;}
#mcs_container .scrollUpBtn:hover,#mcs_container .scrollDownBtn:hover{filter:alpha(opacity=60); -moz-opacity:0.60; -khtml-opacity:0.60; opacity:0.60;}

/* content block 2 */
#mcs2_container{position:relative; clear:both; margin:0; width:260px; height:500px; padding:0 10px; }
#mcs2_container .customScrollBox{position:relative; height:100%; overflow:hidden;}
#mcs2_container .customScrollBox .container{position:relative; width:240px; top:0; float:left;}
#mcs2_container .customScrollBox .content{clear:both;}
#mcs2_container .customScrollBox .content p{padding:10px 5px; margin:10px 0; color:#fff; font-family:Verdana, Geneva, sans-serif; font-size:13px; line-height:20px;}
#mcs2_container .customScrollBox .content p.alt{padding:10px 5px; margin:10px 0; color:#fff; font-family:Georgia, &quot;Times New Roman&quot;, Times, serif; font-size:17px; line-height:19px; color:#999;}
#mcs2_container .customScrollBox img{border:5px solid #fff;}
#mcs2_container .dragger_container{position:relative; width:9px; height:480px; float:left; margin:10px 0 0 10px; cursor:pointer; box-shadow:inset 0 0 10px #000; -moz-box-shadow:inset 0 0 10px #000; -webkit-box-shadow:inset 0 0 10px #000;}
#mcs2_container .dragger{position:absolute; width:6px; height:60px; background:#333; text-align:center; margin-left:1px; line-height:60px; color:#666; overflow:hidden; border-left:1px solid #787878; border-right:1px solid #000; cursor:pointer;}
#mcs2_container .dragger_pressed{position:absolute; width:6px; height:60px; background:#444; text-align:center; margin-left:1px; line-height:60px; color:#777; overflow:hidden; border-left:1px solid #878787; border-right:1px solid #000; cursor:pointer;}

/* content block 3 */
#mcs3_container{clear:both;position:relative; margin:0; width:280px; height:500px; padding:0 10px; border-bottom:1px solid #666; -moz-border-radius:4px; -khtml-border-radius:4px; -webkit-border-radius:4px; border-radius:4px; background:#6D5843; box-shadow:inset 0 0 20px #000; -moz-box-shadow:inset 0 0 20px #000; -webkit-box-shadow:inset 0 0 20px #000;}
#mcs3_container .customScrollBox{position:relative; height:100%; overflow:hidden;}
#mcs3_container .customScrollBox .container{position:relative; width:240px; top:0; float:left;}
#mcs3_container .customScrollBox .content{clear:both;}
#mcs3_container .customScrollBox .content p{padding:10px 5px 10px 15px; margin:0; color:#31231E; font-family:Verdana, Geneva, sans-serif; font-size:13px; line-height:20px;}
#mcs3_container .customScrollBox img{border:3px solid #31231E; margin:0 0 0 15px;}
#mcs3_container .dragger_container{position:relative; width:0px; height:33%; float:left; margin:35px 0 0 25px; border-left:1px solid #31231E; border-right:1px solid #8E7757; cursor:pointer}
#mcs3_container .dragger{position:absolute; width:9px; height:60px; background:#31231E; margin-left:-5px; overflow:hidden; cursor:pointer; -moz-border-radius:6px; -khtml-border-radius:6px; -webkit-border-radius:6px; border-radius:6px;}
#mcs3_container .dragger_pressed{position:absolute; width:9px; height:60px; background:#31231E; margin-left:-5px; overflow:hidden; cursor:pointer; -moz-border-radius:6px; -khtml-border-radius:6px; -webkit-border-radius:6px; border-radius:6px;}

</style>
<script type="text/javascript" src="http://data-traidatmui.appspot.com/scripts/jquery.min.v1.4.1.js"></script>
<script src="http://ajax.googleapis.com/ajax/libs/jqueryui/1.8/jquery-ui.min.js"></script>
<script type="text/javascript" src="http://data-traidatmui.appspot.com/scripts/jquery.easing.1.3.js"></script>
<script type="text/javascript" src="http://data-traidatmui.appspot.com/scripts/jquery.mousewheel.min.js"></script>

<script>
$(window).load(function() {
mCustomScrollbars();
});

function mCustomScrollbars(){

$("#mcs_container").mCustomScrollbar("vertical",400,"easeOutCirc",1.05,"auto","yes","yes",10);
$("#mcs2_container").mCustomScrollbar("vertical",0,"easeOutCirc",1.05,"auto","yes","no",0);
$("#mcs3_container").mCustomScrollbar("vertical",900,"easeOutCirc",1.05,"auto","yes","no",0);
}

/* function to fix the -10000 pixel limit of jquery.animate */
$.fx.prototype.cur = function(){
if ( this.elem[this.prop] != null && (!this.elem.style || this.elem.style[this.prop] == null) ) {
return this.elem[ this.prop ];
}
var r = parseFloat( jQuery.css( this.elem, this.prop ) );
return typeof r == 'undefined' ? 0 : r;
}

function LoadNewContent(id,file){
$("#"+id+" .customScrollBox .content").load(file,function(){
mCustomScrollbars();
});
}
</script>
<script src="http://data-traidatmui.appspot.com/scripts/jquery-CustomScrollbar.js"></script>

5. Save template lại và trở về phần tử trang (Page Elements)
6. Thêm 1 HTML/Javascript và thêm vào code bên dưới
<div id="mcs_container">
<div class="customScrollBox">
<div class="container">
<div class="content">

{ Nội dung của bạn ở đây }

</div>
</div>
<div class="dragger_container">

<div class="dragger"></div>
</div>
</div>
<a href="#" class="scrollUpBtn"></a> <a href="#" class="scrollDownBtn"></a>
</div>

Ở trên là mình sử dụng style 1, nếu bạn muốn sử dụng Style 2 hoặc Style 3 thì bạn hãy thay id mcs_container thành mcs2_container (Style 2), mcs3_container (Style 3)

Lưu ý: Khi nội dung của bạn có độ dài dài hơn chiều cao của khung chứa nội dung thì thanh cuộn mới xuất hiện. Sau khi bạn chọn một style nào đó thì bạn có thể xóa CSS của các style còn lại.

7. Cuối cùng save tiện ích lại

Chúc bạn thành công

Tham khảo thietkewebpro.vn
[Xem tiếp...]


Những tiện ích Recent Posts cho Bloggspot


Tiện ích Magazine Recent Posts cho BloggerTiếp tục chủ đề tạo tiện ích Recent Posts cho Blogger, bài viết này iTechPlus sẽ tổng hợp những style Recent Posts đẹp mắt mang phong cách báo chí, được phát triển bởi Fandung – một blogger trẻ tiềm năng trong giới Blogger Việt Nam.

Do Fandung phát triển nhiều Style cho tiện ích Magazine Recent Post, nên iTechPlus sẽ giới thiệu từng Style một, update thường xuyên ( cho đến hết ), và nếu các bạn biết thêm một style nào khác ( của tác giả khác ) vui lòng để lại comment bên dưới để chúng ta cùng trao đổi và học hỏi nhé !
Style 1 : Recent Post theo Label ở Homepage
Recent Post theo Label ở Homepage
Hình minh họa | Xem DEMO
Thực hiện :
1. Vào Thiết kế > Phần tử trang
2. Tạo một widget HTML/JavaScripts và chèn vào đoạn code bên dưới :
<style type="text/css">
#cotent-news {
border:#999 solid 1px;
width: 650px; }
#top-news {
width: 440px;
height:166px; 
padding:5px;
border:#bbb solid 1px;
background:#eee;
font-size:12px;
}
#bottom-news {
width: 444px; padding:5px;
}
#bottom-news-item {
width: 106px;
margin-right:5px;
float:left;
}
#left-news {
padding:5px;
border-left:2px dotted #ccc;
}
</style>
<script language="JavaScript">
imgr = new Array();
imgr[0] = "http://sites.google.com/site/fdblogsite/Home/nothumbnail.gif";
imgico= "http://farm3.static.flickr.com/2426/3638176588_31366a6822_o.gif";
showRandomImg = true;
topwidth = 160;
topheight = 160; 

botheight = 100;
botwidth = 100;

fntsize = 12;
vnesize = 18; //kích thước của tiêu đề bài viết trong class "top-news"
acolor = "#555";
cmcolor = "#555";
topcolor = "#f00";
aBold = true;
text = "comments";
showPostDate = true;
summaryPost = 250;
summaryFontsize = 12;
summaryColor = "#000";
botnum = 4;
numposts = 14;
label = "Hardware"; home_page = "http://www.itechplus.info/";
</script>
<script src="https://sites.google.com/site/itechroot/javascripts/vne-recent-adv.txt" type="text/javascript"></script>
* Trong đoạn code trên :
  • width: 650px; : chiều rộng của widget
  • botnum = 4; : số bài viết hiển thị ở class bottom-news
  • numposts = 14; : số bài viết hiển thị ở class left-news
  • label = "Hardware"; : nhãn/ trương mục ( Label ) sẽ được hiển thị
Các bạn có thể xem hình minh họa bên dưới để hiểu rõ layout của widget :
Recent Post theo Label ở Homepage Layout
* Cách tính chiều rộng :
  • bottom-news = 4x(botwidth + 2px + 4px) + 4x5px = 444px
  • bottom-news-item = botwidth + 2px + 4px = 106px
* Nếu bạn muốn widget hiển thị những bài mới nhất trên blog thì thay code
https://sites.google.com/site/itechroot/javascripts/vne-recent-adv.txt
thành
https://sites.google.com/site/itechroot/javascripts/vne-recent-adv-all-posts.txt
Style 2 : Recent Post mang phong cách VNExpress
Recent Post mang phong cách VNExpress
Hình minh họa | Xem DEMO
Thực hiện :
1. Vào Thiết kế > Chình sửa HTML
2. Chèn đoạn code bên dưới vào trước thẻ đóng </head>
<style type='text/css'>
.fl {float:left;}
.fr {float:right;}
.folder, .folder-title, .folder-content, .folder-bottom, .folder-header, .folder-top, .folder-news {position:relative;}
.folder-content {background-color:#ffffff;}
.other-folder {width:100%;}
.folder, .folder-title, .folder-content, .folder-bottom, .folder-header, .folder-top, .folder-news {overflow:hidden;}
.folder, .folder-title, .folder-bottom {width:500px;}
.folder-bottom {background:#f5f5f6 url(&#39;http://vnexpress.net/Images/Background/bg_vne.gif&#39;) repeat-x 0px -73px;}
.folder {margin-bottom:5px;}
.folder-title {height: 21px;}
.folder-active, .subfolder {height: 17px;}
.folder-title {font:11px arial; color:#868d9d; background:#f5f5f6 url(&#39;http://vnexpress.net/Images/Background/bg_repeat.gif&#39;) repeat-x scroll 0px 0px;}
.folder-active {padding: 2px 9px; background:#f5f5f6 url(&#39;http://vnexpress.net/Images/Background/bg_repeat.gif&#39;) repeat-x 0px -23px;}
.folder-content {width:478px; padding:5px 10px 5px;font:12px arial; border-left:1px solid #d5d8de; border-right:1px solid #d5d8de;}
.folder-bottom {height:5px;}
.folder-topnews {width:298px; padding-right:20px;}
.folder-othernews {width:160px;}
.folder-news {width:478px; padding:0px 11px; margin-bottom:10px;}
.folder-news p{padding:0; margin-top:0px; margin-bottom:5px;}
.subfolder {padding: 3px 5px 1px;}
.link-folder {font:bold 12px arial; color:#8a0000; text-decoration:none;}
.link-subfolder {font:11px arial; color:#003f7a; text-decoration:none;}
.link-title {font:bold 13px arial; text-decoration:none; color:#000000;}
.link-title:visited {color:#004080;}
.link-othernews {text-decoration:none; color:#000000;font:12px arial;}
.link-othernews:visited {color:#004080;}
.link-othernews:hover {text-decoration:underline;}
.folder-content p{margin-top:0px;margin-bottom:4px;}
.folder-content ul {list-style:none;margin:0;padding:0;}
.folder-content li {
padding-left:6px;
background-image:url(&#39;http://vnexpress.net/Images/Background/black-square.gif&#39;); background-repeat:no-repeat;
background-position: 0 7px;
}
.other-folder {margin-bottom:5px;}
.img-subject {height:100px; border:1px solid #a5a5a5; margin-right:8px; margin-top:2px;}
.img-other {width:53px; height:53px; border:1px solid #a5a5a5; margin-right:5px;}
.folder-activeleft{width:2px; height:21px; background:#f4f5f6 url(&#39;http://vnexpress.net/Images/Background/bg_corner.gif&#39;) no-repeat -5px -0px;}
.folder-activeright{width:2px; height:21px; background:#f4f5f6 url(&#39;http://vnexpress.net/Images/Background/bg_corner.gif&#39;) no-repeat -5px -23px;}
.Lead1 { font-family: &#39;Arial&#39;; font-size: 11px; color: #919090; font-weight: bold }
</style>
&lt;script type=&#39;text/javascript&#39;&gt;
rdlabels = new Array(3);
//Nhãn thứ 1 : Kiến thức căn bản
rdlabels[0] = &quot;\&lt;script\&gt;label = &#39;OSystemK&#39;\;\&lt;/script\&gt;&quot;;
//Nhãn thứ 2 : Thủ thuật
rdlabels[1] = &quot;\&lt;script\&gt;label = &#39;OSystemT&#39;\;\&lt;/script\&gt;&quot;;
//Nhãn thứ 3 : Phần mềm
rdlabels[2] = &quot;\&lt;script\&gt;label = &#39;Download&#39;\;\&lt;/script\&gt;&quot;;
//Nhãn thứ 4 : Phần mềm bản quyền
rdlabels[3] = &quot;\&lt;script\&gt;label = &#39;License&#39;\;\&lt;/script\&gt;&quot;;
index = Math.floor(Math.random() * rdlabels.length);
&lt;/script&gt;
3. Tạo một widget HTML/JavaScripts và chèn vào đoạn code bên dưới :
<div class="folder">
<div class="folder-title">
<div class="folder-activeleft fl"></div>
<div class="folder-active fl"><a class="link-folder" href="http://www.itechplus.info/search/label/OSystem?max-results=10">Windows</a></div>
<div class="folder-activeright fl"></div>
<div class="subfolder fl">
<a class="link-subfolder" href="http://www.itechplus.info/search/label/OSystemK?max-results=10">Kiến thức</a> | <a class="link-subfolder" href="http://www.itechplus.info/search/label/OSystemT?max-results=10">Thủ thuật</a> | <a class="link-subfolder" href="http://www.itechplus.info/search/label/Download?max-results=10">Phần mềm</a> | <a class="link-subfolder" href="http://www.itechplus.info/search/label/License?max-results=10">Free License</a>
</div>
<div class="folder-titleright fr"></div>
</div>
<div class="folder-content" id="tdHomeFolder2">
<script type="text/javascript">
document.write(rdlabels[index]);
</script>
<script language="JavaScript">
imgr = new Array();
imgr[0] = "http://sites.google.com/site/fdblogsite/Home/nothumbnail.gif";
showRandomImg = true;
aBold = false;
summaryPost = 247;
sumPost = 147;
numposts = 6;
home_page = "http://www.itechplus.info/";
</script>
<script src="https://sites.google.com/site/itechroot/javascripts/VnE-recent.txt" type="text/javascript"></script>
</div>
<div class="folder-bottom"></div>
</div>
Trong 2 đoạn code trên :
  • width:500px; : chiều rộng của cả widget
  • width:478px; : chiều rộng phần nội dung widget
  • width:298px; : chiều rộng phần nội dung bên trái
  • width:160px; : chiều rộng phần nội dung bên phải
  • height:100px; : chiều rộng ảnh bài viết mới nhất
  • width:53px; height:53px; : chiều rộng & chiều cao ảnh bài viết đầu tiên bên phải
  • rdlabels[x] : tên của mảng tương ứng với Label. Nếu bạn không gán cụ thể, nội dung của tiện ích sẽ hiển thị một cách ngẫu nhiên theo nhãn.
  • summaryPost = 247; : số ký tự đoạn mô tả bài viết chính
  • sumPost = 147; : số ký tự tiêu đề bài viết
  • numposts = 6; : tổng số bài viết được hiển thị trên mỗi widget
Để hiểu rõ hơn bố cục của Widget, các bạn có thể xem hình dưới :
Recent Post mang phong cách VNExpress Layout
Style 3 : Recent Post mang phong cách Quantrimang
Recent Post mang phong cách Quantrimang.com - Style 1
Minh họa cho list1=1
Thực hiện :
1. Tạo 1 widget HTML\JavaScript và dán code bên dưới vào :
<style type="text/css">
.wbox {background-color:#ffffff;width:auto;height:auto;}
.wbox.Cat {width:500px;height:auto;margin-bottom:5px;}
.wbox .tl {
    background:url(http://quantrimang.com.vn/App_Themes/default/images/left_wbox_03.jpg) no-repeat left top;
    padding-left:3px;
}
.wbox .tr {
    background:url(http://quantrimang.com.vn/App_Themes/default/images/right_wbox_03.jpg) no-repeat right top;
    padding-right:3px;
}
.wbox .tc {
    background:url(http://quantrimang.com.vn/App_Themes/default/images/mid_wbox_03.jpg) repeat-x left top;
    height:23px;
    color:#246296;
    font-size:12px;
    text-transform:uppercase;
    font-weight:bold;
    padding-top:5px;
    padding-left:7px;
}
.wbox .tc a {text-decoration:none;color:#246296;}
.wbox .ml {
    background:url(http://quantrimang.com.vn/App_Themes/default/images/left_contannerbox.jpg) repeat-y left top;
    padding-left:3px;
}
.wbox .mr
{
    background:url(http://quantrimang.com.vn/App_Themes/default/images/right_contannerbox.jpg) repeat-y right top;
    padding-right:3px;
}
.wbox .mc {background-color:#FFFFFF;}
.wbox .bl
{
    background:url(http://quantrimang.com.vn/App_Themes/default/images/bottomLeft_wbox.jpg) no-repeat left top;
    padding-left:3px;
    height:5px;
}
.wbox .br
{
    background:url(http://quantrimang.com.vn/App_Themes/default/images/bottomright_wbox.jpg) no-repeat right top;
    height:5px;
    padding-right:3px;
}
.wbox .bc
{
    background:url(http://quantrimang.com.vn/App_Themes/default/images/bottomMiddle_wbox.jpg) repeat-x left top;
    height:5px;
    font-size:0;
    line-height:5px;
}
.Tin_lienquan ul,.Tin_lienquan li {list-style:none}
.Title_article {
    color:#246296;
    font-size:12px;
    font-weight:bold;
    padding-top:10px;
    padding-bottom:10px;
    padding-left:5px;
}
.Title_article {text-decoration:none;color:#246296;}
.Title_article a {text-decoration:none;color:#303030;}
.Title_article a:hover {color:#990000;  text-decoration:none;}
.imgModule {padding-left:5px;}
.imgModule img {width:120px; margin-right:5px;}
.imgModule a {text-decoration:none;}
.Tin_lienquan {
    color:#797979;
    font-size:11px;
    padding-top:15px;
    font-family:Tahoma;
    padding-left:5px;
}
.Tin_lienquan a {text-decoration:none;  color:#004784;}
.Tin_lienquan a:hover {text-decoration:none;color:#CC3300;}
</style>
      <script type="text/javascript">
                  home_page = "http://itechplus.info/";
                  label = "Office";
                  numposts = 6;
              list1 = 1;
                  sumPosts = 268;
              mode = "label";
      </script>
<div class="wbox Cat">
<!-- Header widget -->
<div class="tl"><div class="tr"><div class="tc"><a href="http://itechplus.info/search/label/Office">Tin học văn phòng</a></div></div></div>
<!-- END Header widget -->
    <div class="ml">
        <div class="mr">
            <div class="mc">
<!-- noi dung cua tien ich -->
    <script type="text/javascript" src="https://sites.google.com/site/itechroot/javascripts/rc-post-qmt.txt"></script>
<!-- END noi dung cua tien ich -->
            </div>
        </div>
    </div>
<!-- Footer widget -->
    <div class="bl"><div class="br"><div class="bc"></div></div></div>
<!-- END footer widget -->
</div>
Thay đoạn code in đậm cho phù hợp với Blog bạn, cần lưu ý :
- list1 : số bài viết có hiện ảnh thumbnail kèm trích dẫn
- mode :
  • mode=”label” : áp dụng cho Label
  • mode=”blog” : áp dụng cho cả Blog
Chúc các bạn thành công !

[Xem tiếp...]


Subscribe


Categories

Popular Posts

Return to top of page Copyright © 2012 | By K3nvil